Pages

Disclaimer

This blog contains some affiliate links and whenever a purchase is made through these links, I receive a small commission. However, I only link products or services that I think would be helpful to my readers and products or services that I myself use or have used and approve of. These small commissions help support our homeschooling and all the great things we share with our viewers. Please note that these commissions do not affect the price of the items.

We are participant in the Amazon Services LLC Associates Program, an affiliate advertising program designed to provide a means for us to earn fees by linking to Amazon.com and affiliated sites.

Monday, October 17, 2016

Making Plural Nouns!

There are so many rules for making plural nouns and I do love the fact that Language Arts and Grammar for 2nd Grade from Annie Moffatt at Moffatt Girls Activity Pack is full of really good and engaging practice.
A quick review of some of the rules:


  • Add -s to most nouns to make them plural (chair - chairs)
  • Add -es to nouns that end in CH, SH, S, SS, and X (peach - peaches, brush - brushes, dress - dresses, fox - foxes)
  • in nouns that ends n -y: with a consonant before y, drop the -y and add -ies (baby - babies);with a vowel before y, just add -s (toy - toys)
  • in nouns that end with -f, -fe, change the -f or -fe for -ves (leaf - leaves, knife - knives)

Now, you can check quick video of  Little V practicing making plural nouns with nouns ending in -y.


 She made the plural of candy - candies.

Hope you have a great day and thanks for stopping by!

Vanessa Z. Pawlicki

Friday, October 14, 2016

Sewing Lessons!!

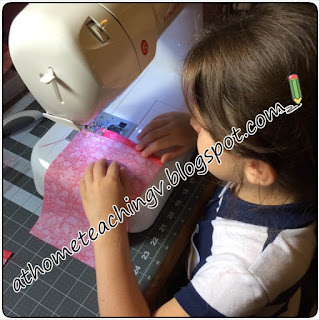
I love sewing and I've been able to make Little V a dress, and some other stuff myself. My love for sewing of course made her want to learn to sew. So, during the summer break we had a few lessons and she was able to make a pillow case for her doll and we started a quilt for her other doll.


Here's a quick video of Little V sewing:


Have a great day and thanks for stopping by!

Vanessa Z. Pawlicki

Wednesday, October 12, 2016

Making Good Use of Activities!!

We all know the adage "Practice makes perfection", right? Based on that we all know also that practice helps a student to really get the idea, helps them to feel confident and sometimes we run out of activities or have to search for more activities or we can simply add something to an activity that you already have in order to give them more practice.

On Lesson 12 of All About Reading level 3, Little V was learning about Syllable Division Rule for Three Consonant Tiles. Basically, she had to figure out where to separate the syllables in words that have 3 consonants between the vowels, like in CHILDREN and PUMPKIN.

One way: like in CHILDREN, first you locate the vowels (highlighted in yellow), then you separate the syllable right after the first consonant in between the vowels. CHIL-DREN

Another way: like in the word PUMPKIN, again locate the vowels, but in this case if you separate right after the first vowel, you won't make a word, so you'll move the second consonant to the first syllable. PUMP-KIN

One of the activities of this lesson was to read the word in a loaf of bread and "cut" them (separate) the syllables with a fake knife. I thought it would impress more on her mind if we could use colors. So I asked her to color the vowels, and then we would check which way would be best. She got it and she was really good at it. After we did it with the markers, she was able to do "cut the bread with the knife" as intended and I was happy to know that she really understood the rules of dividing syllables with the consonants between the vowels.


Hope you have a great day and thanks for stopping by!

Vanessa Z. Pawlicki


Friday, October 7, 2016

Addition to Road Trip U.S.A. Curriculum

Geography wasn't a fun subject for me in school, I honestly dreaded it, so it was one of my resolution to make sure Geography would be a fun learning experience to Little V. We did use Road Trip U.S.A while she was in Kindergarten, but at that time my main objective was for her to learn the states, locate them and maybe as a bonus memorize a few capital cities. It went much better than I expected. Last year, for First Grade we used the Expedition Earth Curriculum and that was great too. This year, I decided that we should learn more about U.S.A Geography and Road Trip U.S.A., from Confessions of a Homeschooler is such a great choice because it gives me guidance and at the same time allows me to add more to it, and that's what I decided to do.

I made a Power Point presentation for each region and the states that belong to that region. We use the coloring pages and the postcards activities from Road Trip U.S.A., and I designed a Book Report.


I also, designed Multiple Choices Quizzes for the end of each state or two covered, and also for the end of each region.

We go to the library and get books about each of the state we are studying, and she uses these books to research the information to fill out the book report. She's loving it and we are learning more than we expected.

Have a great day and thanks for stopping by!

Vanessa Z. Pawlicki

Wednesday, October 5, 2016

We are back!!

I'm so sorry for being so absent here. Little V is already back in school and is now on Second Grade! Wow!! Time is really flying. It was very encouraging to receive an email from one of our followers and know that people do miss us here. So, let's get to what matters, shall we?

We started school on August 22nd, and as usual we had our first day of school picture, can't skip this tradition!


We have had well over 20 days of school and I have already changed some of the curriculum choices I made, they were simply not working for us. Homeschooling already has many challenges, there's no need to add stress by trying to make a curriculum work out when you know it won't. I'm pleased with the new choices so I'll be showing here what are we using right now! It might look like she has a huge load of school work but it's because I separated Language Arts (which includes phonics, spelling, reading, writing, vocabulary, grammar etc...), into different subjects, it just makes it easier for me to keep track of what she's learning.

Math: Math U See Beta


Spelling: All About Spelling Level 3


Reading: All About Reading Level 3


Grammar: Language Arts and Grammar for 2nd Grade no Prep Pack from Annie Moffat @ Moffat Girls


Vocabulary: Vocabulary Workshop Level Purple


Writing: Ready for Writing 2nd Grade from Annie Moffat @ Moffat Girls


Fine Arts: I made our own curriculum based on the book How to Teach Art to Children - Grades 1-6. Also, I did some research from websites like Mrs. Brown's Art Class and Art Project for Kids.


Science: Earth Science & Astronomy for the Grammar Stage from Elemental Science


Geography: Road Trip U.S.A. from Confessions of a Homeschooler


History: I designed our own curriculum based on the books below.


Bible: My Book of Bible Stories and many other activities from jw.org


Portuguese: I designed the curriculum as well.


We are very pleased with the choices we made and we are having lots of fun with our Second Grade Homeschooling.

Have a great day and thanks for stopping by!

Vanessa Z. Pawlicki

Tuesday, June 14, 2016

Graduation Cap Card - Directions!!

Hello everyone, finally I had a chance to sit down here and show you the directions for how to make the card.


What you will need:

- cardstock measuring 8" x 8" of the color you want, I used purple because Little V likes it
- ruler
- some scoring tool
- 2 pieces of white cardstock measuring 3-3/4" x 3-3/4" (for the inside)
- some Happy Graduation themed stamp set
- ink pad (either black or the cardstock color you picked)
- Star shape paper punch or star stickers or any other embellishments you want
- a brad ( I used a silver heart brad)
- some perforating tool 
- bone folder

Let's get to the directions, shall we?

First, make sure you cardstock measure 8" x 8", you might need to cut the cardstock to get to this measurement. Also, a good time to cut the 2 pieces of white cardstock so they can measure 3-3/4" x 3-3/4" each.

You can stamp the white pieces of cardstock now, and decorate them as you wish and set them aside to dry.

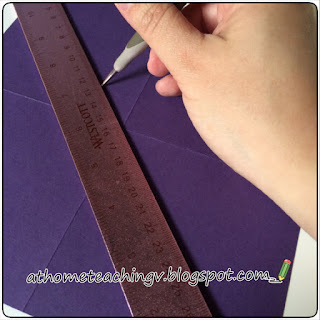
Now, it's time to score the 8" x 8" cardstock: score on both sides (landscape and portrait) at 4"


Or you can simply fold the cardstock in half on both sides:


 Make sure to use a bone folder to mark the creases well. Next step, open your carstock and with the help of a ruler and a scoring tool, score a diagonal line from one side to the other.


Again use a bone folder to mark the diagonal crease well. 


This diagonal crease will allow you to open and close the card. Next, make a perforation on the "top" part of the card, the part that you will hang the tassel and secure it with the brad. The perforation is for the brad. At the 2" mark you make a little hole. 


Now, all you need to do is the tassel, and add the 2 white pieces of cardstock that you stamped and your card is ready to go!

Since I have craft tools I was able to punch a slot for a giftcard for Little V, You can do the same using a ruler and a craft knife. 

I tried to make a video so you could follow all the steps, but I just couldn't get a good visual angle, so I'll share a link to the website I learned to make this type of card, visit The Stamp Camp, and there on the search box you'l type :graduation hat card/gift card holder and you'll be directed to a video where she shows how to make the card!

Hope you'll enjoy it!

Have a great day and thanks for stopping by!

Vanessa Zeferino.

Tuesday, May 31, 2016

Graduation Day!!!

Wow... I  can't believe how quickly this school year went by! It feels like it was yesterday when we were going outside to take the first day of school traditional picture, and here we are, already enjoying our summer vacation from school.


Little V, officially completed her schooling for first grade last Tuesday, May 24th, and now we will be able to get some rest, have some summer fun. She will be doing her swimming classes again during the summer, which starts today!

Her Certificate of Completion I made myself, using cliparts from Pretty Grafik Designs. The card I also made myself, it's the second year I make the same style of graduation card ( I just love it). It's pretty easy and simple to make and I'll soon share directions on how to make it, so you can make your own cool graduation cap card! I'm just trying to figure out if it will be easier to demonstrate it with a video or pictures.

During this summer, we will also be participating in a nature pal exchange  with some other homeschool families, which I will give more information as soon as we have more done. We already started picking up some nature samples for the nature pal exchange.


Happy Graduation to Little V and to all the other little hard workers out there!

I will still be sharing more stuff we did during the school year, our choices of curriculum for the next school year and what interesting things we will be doing during our summer break!

Have a great day and thanks for stopping by!

Vanessa Z. Pawlicki

Tuesday, May 24, 2016

After the 100th Day of School!

Good morning!!! Today, it will be a quick post to share something fun we started doing last year. From day 1 of school we do a countdown for the 100th day of school, and on the 100th Day we do some fun and cool activities to celebrate this what can be considerate a milestone. I didn't have any of that in my schools back home (Brazil), but when I saw it here I thought it was a neat experience and something the kids can look forward to, and I definitely wanted Little V to experience it.

So we mark down each day from day 1 until the 100th day, but then I decided that Little V could from then on, make her countdown to Graduation Day and that's what we do after celebrating the 100th Day!


The picture above was taken on Monday, May 23rd which was her 175th day, so today she will be all done with First Grade, and soon I will post more about her last day in school!

Thought would be a good idea to share what we do after the 100th day! Hope you enjoyed it and feel free to share ideas of your own on the comments section below, or contact me through the contact form on the right sidebar, we would love to hear from you.

Have a great day and thanks for stopping by!

Vanessa Z. Pawlicki


Monday, May 23, 2016

Our "Expedition Earth" is Completed!!!

Good morning, as we were approaching the finals days of the first grade, we were finishing our various curricula. Most of them offer a Certification of Completion, which is something fun to give to the student, and helps them to have a feeling of accomplishment and also gives them that great feeling that vacation is right on the corner!!

If you have been following our blog, you know I chose Expedition Earth from Confessions of a Homeschooler for our Geography Curriculum for first grade. What I like about the Curriculum is that it is very hands on, she put together lots of crafts in it, there are recipes so you can try dishes from the countries you are "visiting".

We had lots of fun "visiting" 29 countries and learning about Antarctica and the Arctic Circle. We started by making use of most of the activities but our days in school were getting pretty long and Little V wasn't much excited towards the end of the day, so I decided to leave some of the activities behind and use them for the next time we use this curriculum.


I can't believe first grade is coming to an end!! Time went by so fast, it feels like it was yesterday that we were building a model of the Great Wall of China.


Now, it's time to start searching for the Second Grade Geography Curriculum!


That's it for today! Hope you are having a great day and thanks for stopping by!

Vanessa Z. Pawlicki.

Thursday, May 19, 2016

A Cool Pine Cone Experiment!

Hello, today I'm sharing a cool experiment that we did in our homeschool when we were leaning about cones. We had these cones since last year, I saved them from one of our trips to the Arboretum, because I knew I would need them for an experiment.

Initially,  we read about cones, and then she wrote some important facts about them in her worksheet that is part of her Science Curriculum. We took a closer look at them to identify the parts, and I wanted something more hands on, so I went online, researched and found some cool worksheets at The Crafty Classroom, then Little V was able to label the parts of the pine cone and we also found another cool experiment.

The pictures below, show that we submerged one pine cone in water, after about 2 hours we could see that the pine cone scales started to close up.


Then, 6 hours later check out how closed up the scales were!!


Cool, right?! I didn't now that and we were pretty excited about it! So we did some extra research and learned that the pine cones scales respond to changes in humidity. When it's warm and dry the scales open up to release the cone's seeds and when it's humid or wet, the scales close up by expanding the scales cells.

Well, that's it for today! Hope you enjoyed our little experiment!

Have a great day and thanks for stopping by!

Vanessa Z. Pawlicki


Monday, May 16, 2016

Cursive Handwriting!!

Hello, today I want to tell you about our cursive handwriting practice. When we first started, Little V practiced a letter a day, using the A-Z Cursive HandwritingWorksheets from Confessions of a Homeschooler. You can download them for free at her Printables section. These were colorful worksheets, that I printed and put them in a binder special for Handwriting Practice, which includes also the A-Z Handwriting manuscript version and numbers.

To save paper and ink, I printed only one copy of each letter and placed each copy inside a page protector, and Little V used those thin expo markers to trace the letters.


Then, while searching online for a Cursive Handwriting Curriculum I found more worksheets, also available for download for free at another cool website - K5learning. These new worksheets I can print in black and white and, somehow I just feel that this way she has a better feeling while practicing directly on the paper, a little more costly, but you can print in the front and back of the paper (saves a little paper). These worksheets allow her to practice the capital and lower case letter just like the ones from Confessions of a Homeschooler but she can also have a feeling of how to write words in cursive. There are also worksheets that are all about words, which we haven't use them yet, since I want her to have a good practice and feel confident about doing the letters first.

A short video of what we are doing:


Now. since there is so much debate regarding teaching or not to teach cursive handwriting, and giving that cursive writing is not required by the National Common Core Standards, why did I chose to add this to Little V curriculum? I will then add a few reasons why I personally think it's important.

1) I learned cursive while I was in school before I learned manuscript.

2) I think it's beautiful to write in cursive, therefore I want my daughter to learn it. 

3) How will your child have his or her unique signature later in life, if he or she won't learn cursive? 

I do a lot of online research and  I found many reasons that I think are true to why teaching cursive handwriting is important and below it's one reason I read and totally agree:

3) "There is even a movement afoot among some reading experts to begin teaching cursive before block printing, as they have found that the connections between letters required in cursive writing may reduce letter reversals. - See more at: http://www.washingtonparent.com/articles/1212/cursive-writing.php#sthash.LesbbSmK.dpuf

This alone, is a great reason since it's practically impossible for a kid to mix up "b" and "d" with cursive handwriting. I had this problem with Little V and worked on it, today she's fine and since we started the cursive handwriting I noticed she no longer hesitate before writing "b" or "d". 

Again, just as a reminder, I 'm just sharing what I think and what we do in our homeschooling. Ultimately, the parents are the ones who have to make their own decision based on how they feel and on the researches they do.  

Hope you enjoyed our post. If you have any questions feel free to leave a comment below or contact me through the contact form. I'll answer as soon as possible. 

Have a great day and thanks for stopping by!


Vanessa Z. Pawlicki


Wednesday, May 11, 2016

All About Spelling Level 2 Successfully Completed!!

Not a secret at all that I do love the All About Spelling Curriculum, this was our second year using it and yes we will use it again for next year - 2nd grade!
It's an easy curriculum to prepare for teaching, they basically help you out with all the explanation. Very important to use the app also, so you can hear the proper pronunciation of the phonograms.

You first learn how to spell words with the phonograms taught in each step, then some steps they have more words to spell. We usually do first spelling with the tiles, the next day we spell the same words on paper, if there are new words she spells them on paper, then phrases and  finally sentences.

If during spelling pracrice, she's writing a word wrong, I wait to see if she will figure out by herself before pointing it out, most of the times she figures out on her own that the word doesn't sound right, so she tries again, and if she's struggling we sound it out and she gets it and feels so proud of herself.

There's always a reviewing section before start a new step/lesson, which is great to keep things fresh in mind.

Last year, as soon as we finished Level 1 we started level 2, but this year we won't do it. We had to review all the steps we had started while still on Kindergarten, so I decided to use these last days of school to review some of the steps and keep practicing what she already learned.


Above, is Little V holding her Certification of Completion of Level 2. I'm so proud of my little student, she's so dedicated and love learning. I couldn't have asked for a better student!

If you would like to check more about the Spelling curriculum we use, please feel free to check their website at All About Leaning Press. There free downloads, the Phonogram app I mentioned above is free to download as well, and there are free lesson samples too. You can also follow their blog which includes many useful tips to make learning a great experience. 

Spelling is such an important skill to be mastered, and we do love All About Spelling because it does takes the struggle out of spelling just as they promise. 

If you have any questions, please feel free to use the contact form or leave a comment below and as soon as I have a chance I will get back to you. 

Hope you have a great day and thanks for stopping by!

Vanessa Z. Pawlicki
Wednesday, May 4, 2016

Trying something new!!!

I was thinking of trying something new to keep the blog more active. I'm planing to pick a day or two of the week and try to add as much info as possible.

November of last year I started working PT and my schedule since then has been even more hectic than before. But on the positive side I want to continue sharing my experience and let Moms out there now that it is possible to work and still be able to homeschool.

I feel that Little V by no means lost on the quality of her schooling, I just need to be more organized and time management is a must to work on and develop. We still have lots of fun while schooling and I can't believe she's on her final weeks of first grade, it feels like it was yesterday when we went outside to take our first day of school traditional picture.

For several weeks she was learning about the Human Body, we purchased a microscope. I do like the one we got her, very affordable and I think it will do its job for the years to come.

She got to see how one of her own hair looks in the microscope lens.


We also did for those weeks, while studying about the Human Body, an experiment to observe the patterns of finger prints. She rubbed the sharpened end of a pencil on a sheet of paper (top left picture), then she rubbed each finger tip on the paper (bottom left picture). Next, she applied a piece of clear tape on the dark spot of the finger tip and transferred the tape to the paper and wrote down which finger that piece of tape belonged to.

This helped her to learn that each person has an unique finger print and that these personal signatures form at five months before birth and they never change.

If you are interested, you can find this science experiment and many more that we used at Janice VanCleave's Biology for Every Kid - 101 easy experiments that really work.


For Arts, she was learning about Paul Cezzane and here you can see her working on an inspired still life piece from Cezzane, She used fake fruits and vegetables from her kitchen and used watercolor paint on watercolor paper.

Hope you enjoyed our post and if you have any questions, please feel free to leave a comment below or contact me through the contact form.

Hope you have a great day and thanks for stopping by!

Vanessa Z. Pawlicki

Monday, February 1, 2016

First Grade 100th Day!!

Hello everyone!!! I really miss having more time to write here, but today I managed to find some time to let you all know that yes, we reached our 100th day of school already! We celebrated it last year and I thought it would be nice to continue celebrating it each year... maybe later on she might not be so interested in it anymore, so as for now let's enjoy it while we can!

Since we both are sick, I didn't have a chance to make as much stuff as we did last year, but I was able to make a card and matching cupcake toppers.


No, I didn't bake the mini cupcakes, had to buy them ready, but they are actually tasty. She loved it all and was so happy and we are so proud of her, she's such a great student, very dedicated and we love so much that we are able to homeschool her. 

Hope you enjoy the quick post! Do you celebrate the 100th day? We would love to hear what are your traditions!

Have a great day and thanks for stopping by!

Vanessa Z. Pawlicki