What you will need:
- cardstock measuring 8" x 8" of the color you want, I used purple because Little V likes it
- ruler
- some scoring tool
- 2 pieces of white cardstock measuring 3-3/4" x 3-3/4" (for the inside)
- some Happy Graduation themed stamp set
- ink pad (either black or the cardstock color you picked)
- Star shape paper punch or star stickers or any other embellishments you want
- a brad ( I used a silver heart brad)
- some perforating tool
- bone folder
Let's get to the directions, shall we?
First, make sure you cardstock measure 8" x 8", you might need to cut the cardstock to get to this measurement. Also, a good time to cut the 2 pieces of white cardstock so they can measure 3-3/4" x 3-3/4" each.
You can stamp the white pieces of cardstock now, and decorate them as you wish and set them aside to dry.
Now, it's time to score the 8" x 8" cardstock: score on both sides (landscape and portrait) at 4"
Or you can simply fold the cardstock in half on both sides:
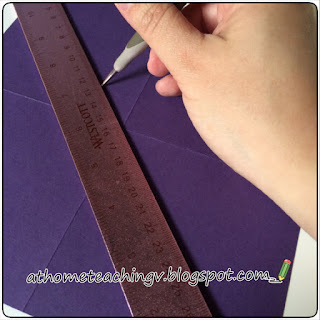
Make sure to use a bone folder to mark the creases well. Next step, open your carstock and with the help of a ruler and a scoring tool, score a diagonal line from one side to the other.
Again use a bone folder to mark the diagonal crease well.
This diagonal crease will allow you to open and close the card. Next, make a perforation on the "top" part of the card, the part that you will hang the tassel and secure it with the brad. The perforation is for the brad. At the 2" mark you make a little hole.
Now, all you need to do is the tassel, and add the 2 white pieces of cardstock that you stamped and your card is ready to go!
Since I have craft tools I was able to punch a slot for a giftcard for Little V, You can do the same using a ruler and a craft knife.
I tried to make a video so you could follow all the steps, but I just couldn't get a good visual angle, so I'll share a link to the website I learned to make this type of card, visit The Stamp Camp, and there on the search box you'l type :graduation hat card/gift card holder and you'll be directed to a video where she shows how to make the card!
Hope you'll enjoy it!
Have a great day and thanks for stopping by!
Vanessa Zeferino.


